At this point, the Glass Nail trend has just about hit fever pitch. We at Soko Glam were lucky enough to meet and hang out with Park Eun Kyung, the manicurist who created this holographic and majestic nail look. She told us that her inspiration for the iridescent shine actually came from the mother of pearl texture in abalone shells— we find its nail art translation a pretty great take on mother nature.
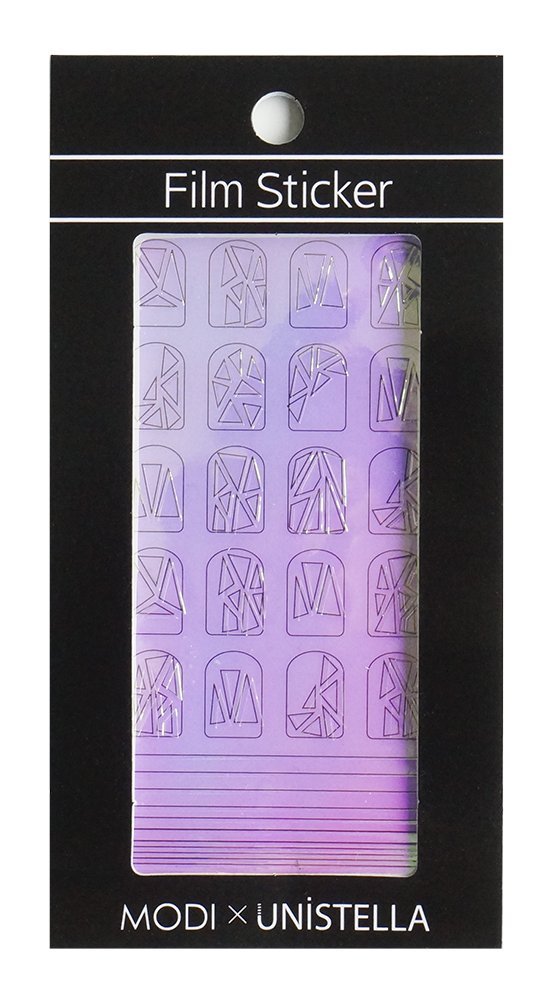
After pretty much all of South Korea went bonkers for the look at Park’s salon, Unistella, she teamed up with Amore Pacific to offer these amazing nail film stickers so anyone could recreate the look at home. Pretty sweet! While they look pretty in the packaging, it’s not a total cake walk putting these things on, so I’ll be here to walk you through giving yourself the coolest glass nail manicure that may even make abalones jealous of your nails.
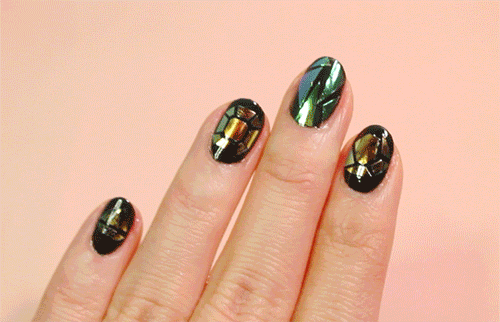
This photo doesn’t do their iridescence justice!
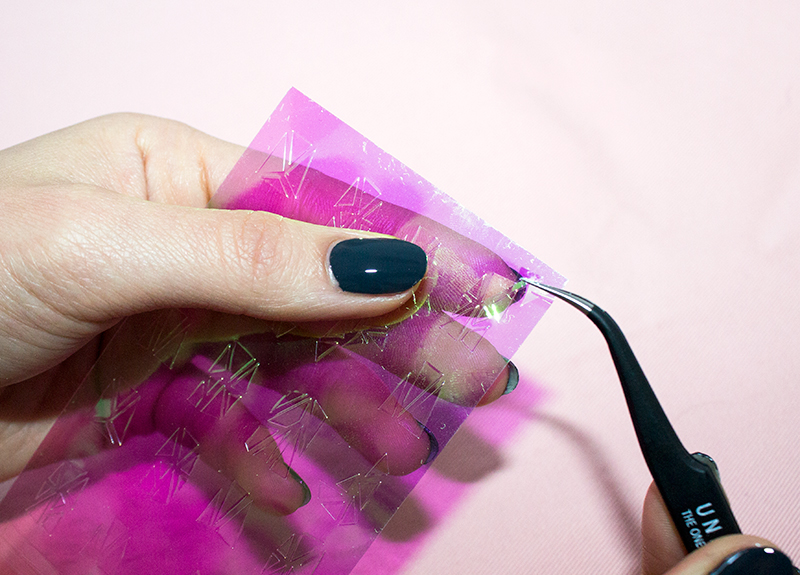
First of all, you’re going to need some gel nail polish and a pair of tweezers. There is some room for customization since you can choose whichever base color you like—it’ll make the stickers shine and reflect a bit differently depending on what color is underneath them.
Fun fact: You can cut the remaining sticker film into MORE shards once you’ve finished all these!
I chose a deep gray because I like how it makes the film give off a beetle-wing kind of shine. I noticed if you do these over a clear base coat though, they’ll appear as they do on the film.
I used Sally Hansen’s Miracle Gel topcoat as the gel sealant. It’s thicker and hardier than regular top coats, which comes in handy when you’re painting it over decals on your nails so they don’t lift off and flake, dashing all the intense concentration and struggling you’re likely to be doing to get these on your nails in the first place (if you’re me). I have fairly steady hands so this only took me about an hour (mind you, Netflix was on the background so I was partially distracted).
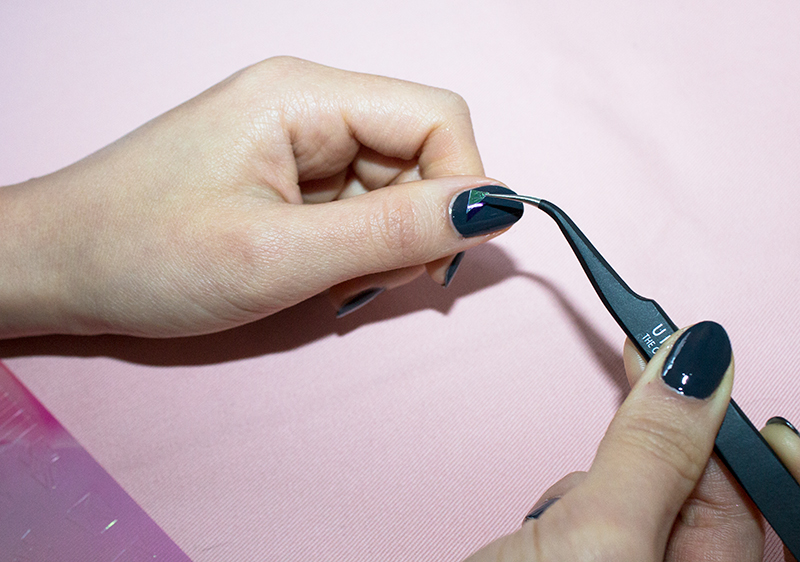
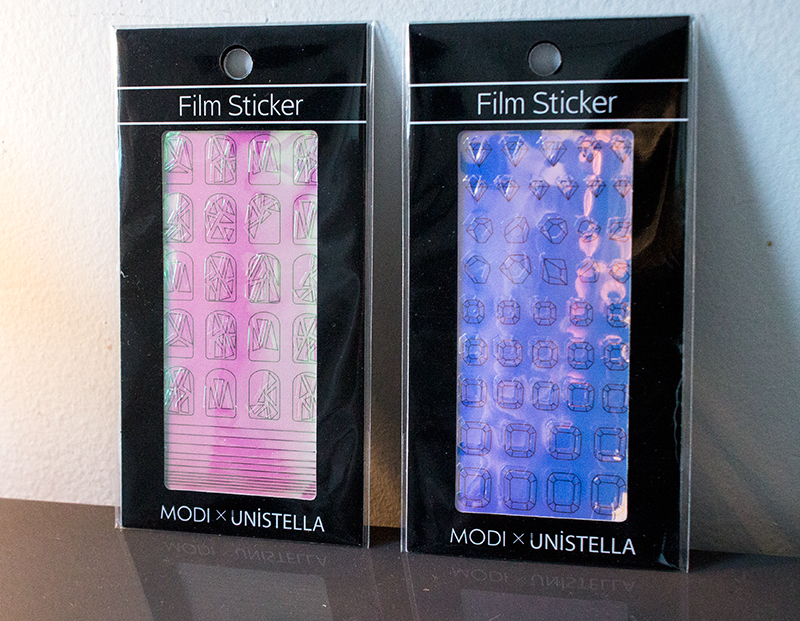
Once your basecoat is applied and dried, using your tweezer, take a little “shard” from the film sheet and place it on your fingernail in whatever configuration of design you like. I find that using the film sticker sheet #1 is a bit easier in terms of placement, since the Emerald sheet #2, has geometric or jewel-like designs that demand proper placement to maintain the shape. If you’re keen on having little diamonds and gems on your hand, but want to mix it up like I did here, I recommend using whichever is your dominant hand to apply the Emerald sheet. It’ll make your life easier, trust me.
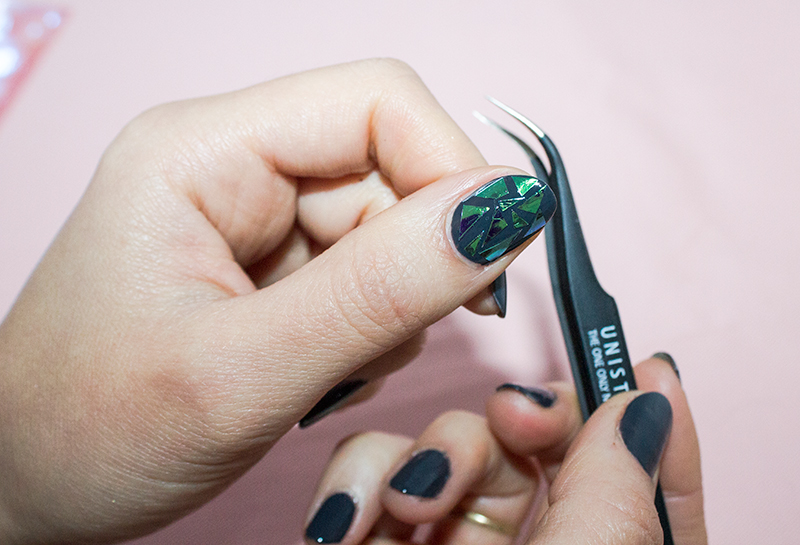
Okay, so now you’re repeating laying down all these teeny film stickers so your nails look properly “shattered” (or bejeweled—whichever your preference). Don’t be afraid to layer some of the shards on top of one another to create a multi-dimensional effect.
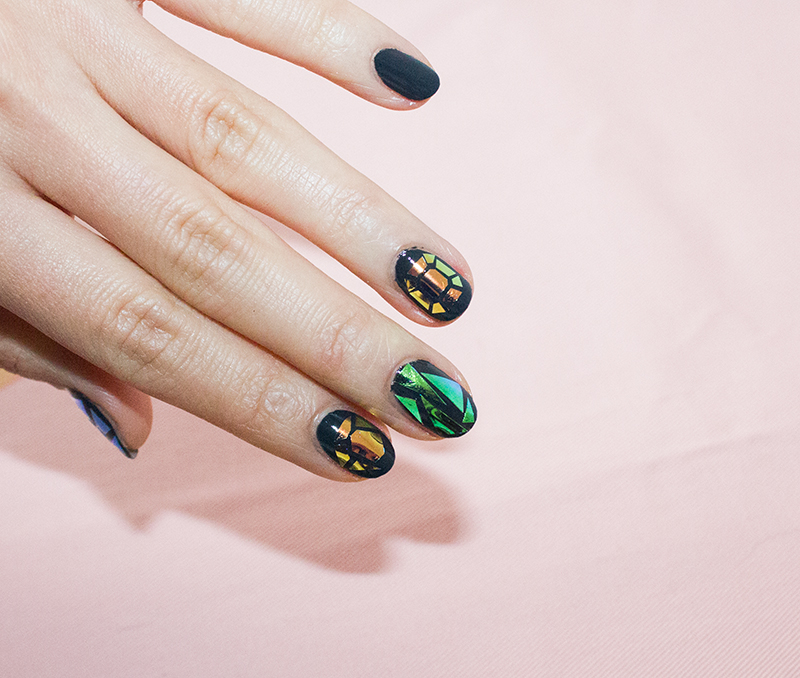
Sheet #1 is more pink/green iridescent and sheet #2 is kind of blue/orange iridescent.
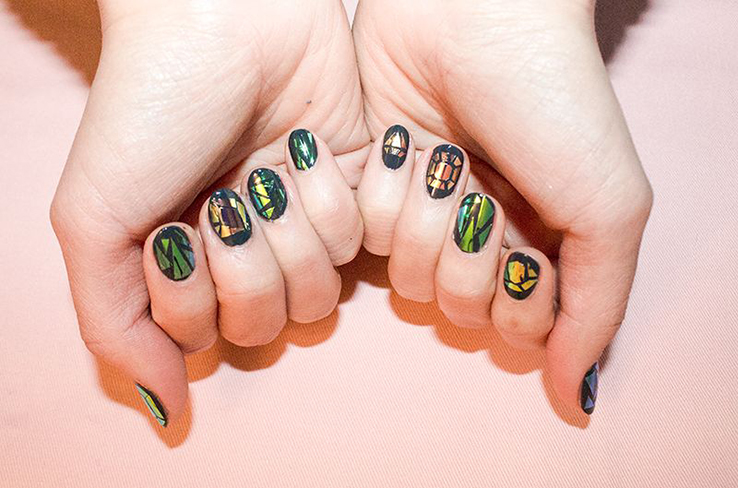
Look how cool and magical they look! This doesn’t even really do them justice since they’re so crazy iridescent in whichever light that passes over them. They may take a while to apply, but these babies are “gelled” on, so they’ll be stuck on you for up to two weeks. It helps if you re-apply top coat every few days too, since I don’t know about you guys, but my nails take plenty of abuse from my daily tasks.
I want to see all your fabulous glass nail creations on yourselves—you should definitely Instagram it with hashtag #sokosecret so we can double-tap!
— Sable
Sable Yong is a beauty writer and editor as well as Soko Glam’s Senior Digital Content Manager. She lives in Brooklyn where she enjoys eating bread and playing music (not at the same time) when she isn’t hoarding beauty products. Sable has never once #wokeuplikethis, but that’s okay otherwise she’d probably be out of a job. Follow @sabletoothtigre for snaps of her life.