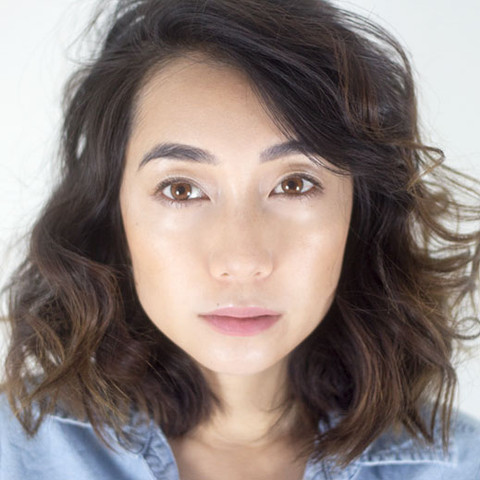
There’s a reason why Korean skincare is so thorough. From the double cleanse to beloved sheet masks, Korean skin care is unparalleled. Why? Because Korean beauty looks all start with a fresh-faced, healthy glow.
To keep my skin looking less haggard, more K-pop star, I’m currently all about Obagi mixed in my favourite Korean standbys (Missha sunblock and serums). While great skincare is definitely key to a beautiful complexion, sometimes we all need a little extra help.
Here is my step-by-step guide to getting that gorgeous Korean dewy look. This is “contouring,” Korean style.

STEP 1. Start with a primer
After the basics (cleansing, toning, moisturizing and sunscreen), I start with a primer. This will prep the skin, allowing a smoother base for foundation or BB cream and help makeup last longer.

STEP 2. Apply BB cream
Using a damp sponge, I apply BB cream to the face. I like Fairy Drops Candybar BB Cream, which provides amazing coverage without appearing too thick or cakey.
To get that Korean glow, highlighting is crucial. I’m into this technique as it also conceals undereye circles. I’m using Maybelline Instant Age Rewind Eraser Dark Circles in a shade lighter than my skin tone. Because this particular concealer is formulated for use under the eye, its creamy consistency means that it hardly settles into lines and applies very smooth. I apply it under the eyes, the bridge of the nose, centre of the forehead and chin.
STEP 4. Blend concealer with damp sponge
Again, I blend the product into the skin using a damp sponge. Though the results may look a bit ghostly, some light handed contouring will bring dimension back into the face.
STEP 5. Slight Contour & Blend
With a matte brown powder (I’m using Urban Decay’s Buck), I lightly contoured the sides of my nose, underneath the cheekbones, around the hairline and under the chin. A favoured Korean face shape possesses the “V Line” jaw, with a broader forehead and a dainty “v” shaped chin. This is what I’m trying to emulate with the contour. I’ve done this with a heavy hand to show where the contour should go. While this look is perfect as a subtle homage to Cats the Musical, you’re most likely going to want to go ahead and blend with a fluffy brush like so:
STEP 6. Orange Blush
Another Korean favourite is orange blush, applied higher on the cheek rather than on the apples. I’m using The Face Shop Single Blush in Orange Some.
STEP 7. Highlight Again
More highlighter! To make skin appear even more luminous, apply a cream or liquid highlighter on the bridge of the nose, the tops of the cheekbones, the chin and underneath the brows. I’m using RMS Living Luminizer, which gives the skin a radiant sheen. Another favorite is the Son & Park Highlight Cube that gives me the perfect luminous highlight.
STEP 8. Straight Brows
Straighten up those brows. A popular Korean eyebrow shape is the straight brow, which are meant to look more youthful (think back to what your brows used to look like before you went pluck-crazy in high school). Using an angled brush, a matte dark eyeshadow, and light feathery strokes, I fill the arch in to make my brows as straight as possible. Another favorite is the Tony Moly Auto Touch Eyebrow pencil because the pencil is angled, it comes with a built-in spoolie brush and you never have to sharpen them.
STEP 9: Shimmery shadow & Matte Pink Lips
On the eyes, I add a light shimmery shadow, while using a matte pink on the lips. The result is very simple, yet put-together. You can see how the concealer/highlighter highlight has given my skin a soft glow.
STEP 10. Hairline Contour
Before & After Hairline Contour
The difference is ever so subtle, but it’s there.
If the glow is too much and you’re getting to oil-slick territory, very lightly apply finishing powder on the areas that are too shiny. Since I have combination skin, I concentrate on the T-zone, where I’m more oily. Korean sebum control powder pacts like the Son & Park Flawless Pore Pact are my personal favorite when it comes to powders.
There you have it. Glowing contoured skin, the Korean way.
Now you tell me all your favorite ways to highlight in the comments!
—Mari Santos
Mari Santos is a writer/fashion designer based in Toronto. She has contributed to xoVain, Marie Claire, Good Housekeeping, Cosmopolitan as well as various other outlets, and has a weekly GIF column with The Debrief. Follow her @mar1onette.
