Derma rollers are small cylindrical devices with anywhere from 180-1000 needles that you run across your face. Scared yet intrigued? Here’s how to use a derma roller the right way.
The concept behind derma rollers is that when you create these micro wounds in your face, your skin works to repair itself by stimulating the production of new collagen (this is backed by various studies, which you can find here). The creation of this new collagen helps to reduce the appearance of acne scars, age spots, fine lines, wrinkles, and improves overall skin texture.
I know, I know—using a roller with needles on your skin must sound terrifying, but believe me, it looks much worse than it really is. I have been derma rolling my skin for well over six months now with no adverse effects or harm to the skin. The biggest question I get is isn’t it painful? For me? No. Remember though, everyone has a different pain tolerance and what it is completely fine for me may not be for you. If you’re afraid of the pain, you can always use a numbing cream. In fact, most dermatologists or spas use numbing cream on clients before the procedure.
If you want to know how to derma roll on your own without hurting your skin, I’ve created a handy guide:
When to derma roll:
Do it at night because your skin will need time to repair itself. The wounds you create should heal within 15-30 minutes but derma rolling at night assures your skin gets the proper rest it needs. Avoid hot showers, exercise and makeup for at least 24 hours after since you don’t want to irritate your already sensitive skin. But the number one tip of all is do not roll over active acne. Rolling over active areas of acne will only spread the bacteria to the rest of your face. Don’t do it!
How often to derma roll:
I usually derma roll once a week since it takes a bit of after care and you really want to allow your skin the chance to heal in between sessions. When I first started, I aimed for once every two weeks since I was just introducing my skin to this process, but as I progressed, I moved on to once a week. If you’re concerned about not wearing make up the next day, try doing it on a weekend. I usually aim for Saturday so I have all of Sunday to allow my face to relax.
What kind of derma roller to get:
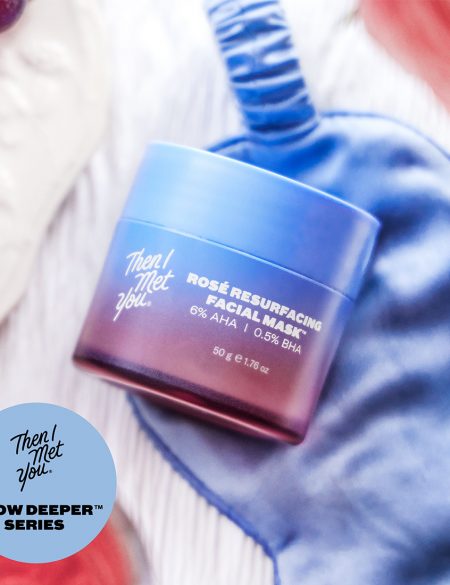
Derma roller needles can range in size from 0.25mm to 2.0mm. The size of the needle you choose is dependent on what skin issue you’re trying to target. I use a 0.50mm needle since I’m not really trying to get rid of any major deep set wrinkles or acne scars, I’m just trying to improve my overall skin texture and target whatever fine lines may be starting to creep up. The 0.25mm to 0.75mm needle is great for targeting any acne scars or hyperpigmentation as well as any fine lines and wrinkles. I don’t suggest using 1.0mm or higher at home since these deeply penetrate the skin, and if you use them incorrectly, you can damage the skin. if you’re interested in purchasing a derma roller you can find a good one here.
Sanitize your derma roller:
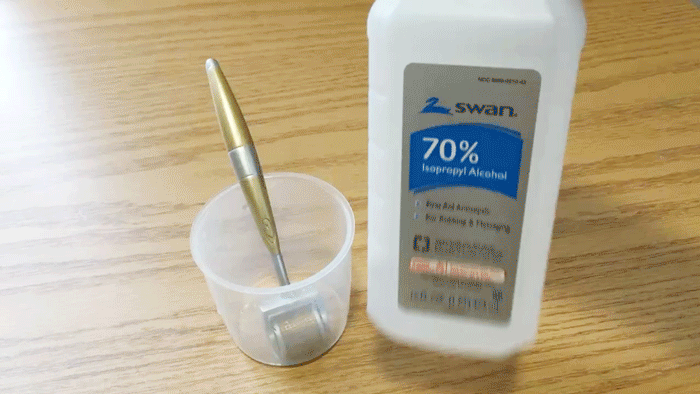
Before you begin derma rolling, make sure to sanitize the roller properly. I do this by taking a 70% isopropyl alcohol and soaking my derma roller in the solution for at least 30 minutes. Make sure you cover the head of the derma roller completely in alcohol.
Double cleanse:
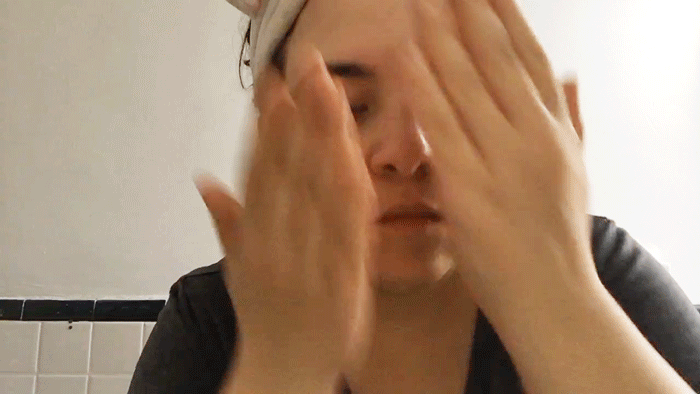
While this is soaking, I take the time to double cleanse my face. This step is super important as you want to make sure your skin is as clean as possible, so definitely take your time while cleansing to get rid of all of your makeup. If you want to take it a step further, you can also go for a triple cleanse and use a cleansing water to make sure you’ve gotten rid of all leftover over makeup or residue.
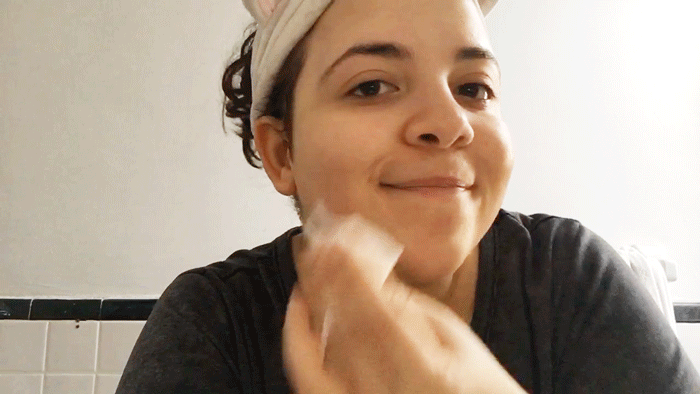
After your face is all nice and clean, remove your derma roller from the solution and set it aside to dry. At this point, I take an alcohol soaked cotton pad and gently swipe it across my face. Before you freak out about using alcohol on your face, let me explain why I do this: Since you’re putting tiny needles on our face, it’s essential that you have your skin as clean as possible. Using the alcohol takes it a step further and rids the skin of any possible germs or bacteria.
Hydrate with a serum:
Post-cleansing with the alcohol pad, I use a super hydrating serum on my face. I usually go for a pure hyaluronic acid or copper-p serum (one of my favorites is the Klairs Rich Moist Soothing Serum) as this will help to hydrate and soothe the skin as I derma roll over it. I tend to go a bit heavy handed with the application because I want the serum to take its time to absorb while I’m derma rolling. The serum also helps to create a slippery surface for the derma roller so it can glide over the skin much easier.
If your serum absorbs before you’re done derma rolling, no worries! Just add a bit more so you can complete your session. You’re going to look super shiny during this process but it’s worth it.
How to derma roll:

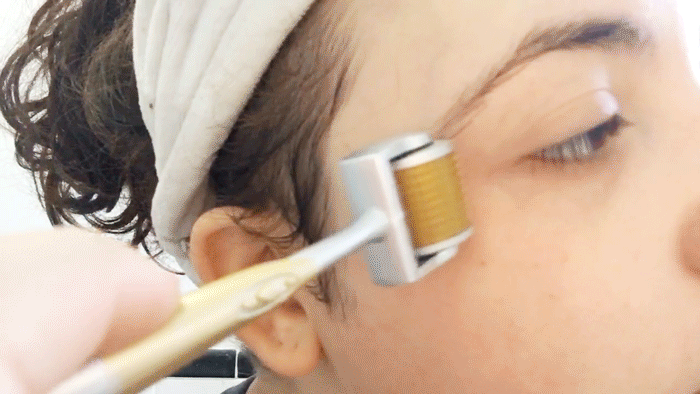
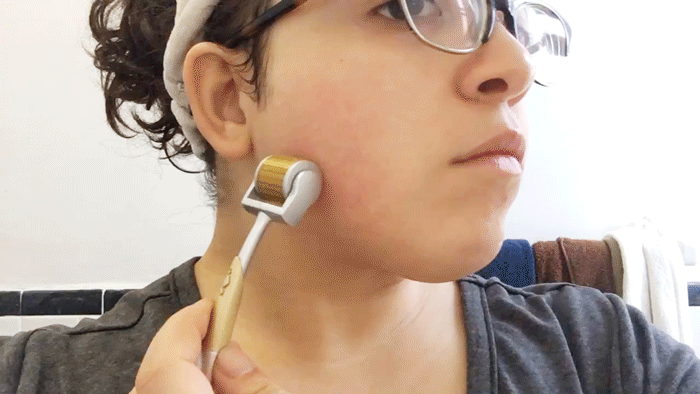
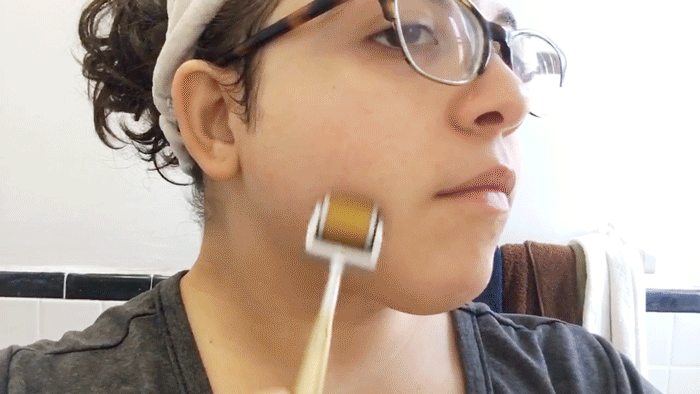
Here’s the fun part! Derma roll section by section. You can start anywhere you like but you’ll want to go over the cheeks, the forehead, the nose, the chin, the lips (this will create a temporary plumping of the lips) and the jaw line. If you’re brave, you can also derma roll by the corner of your eyes (where crows feet would usually occur) but you want to be super gentle in this area.
Roll it in several different directions on each section of your face: from left to right, top to bottom, and then diagonal both ways. Roll it in each direction at least 4 to 8 times. This ensures that you’re targeting every part of the skin.
If you want, after you’re done with the first session, you can apply more serum and go back over it a second time to get any areas you may have missed. The most important tip during this process: Lift the derma roller as you change directions! Dragging the roller in a new direction will only work to harm the skin. Also, apply a gentle amount of pressure and don’t overdo it.
In total, derma rolling takes about 5-10 minutes (spend at least a minute on each section of the face) so it’s a super short process.
Immediately after derma rolling:

Right after derma rolling you’re going to be red as a lobster but don’t panic—it’s temporary. Any redness that you may experience should go away within 30 minutes to an hour. But it really depends on how sensitive your skin is and how aggressive you go with the derma roller, so you may be a bit red the next day, but this will also go away.
Your skin will also feel tight and like it has a slight sunburn, but this is completely normal. I like to sheet mask right after with a hydrating one, like the Klairs Rich Moist Soothing Mask as it helps to calm and soothe any redness. Also, make sure to follow up with a super moisturizing cream!
Don’t forget to sanitize your derma roller and allow it to dry after use. You want to do this before and after every single session to make sure you’re keeping it as clean as possible.
The next day:
My skin always feels so smooth the day after derma rolling and it ends up having a much more even and glowy look to it. But remember: The long term results are not instantaneous (nothing in skin care really is), and if you’re targeting more deep set acne scars or wrinkles, you’ll want to be consistent with derma rolling. If you are, you should see results after a couple of sessions. Beauty takes time!